
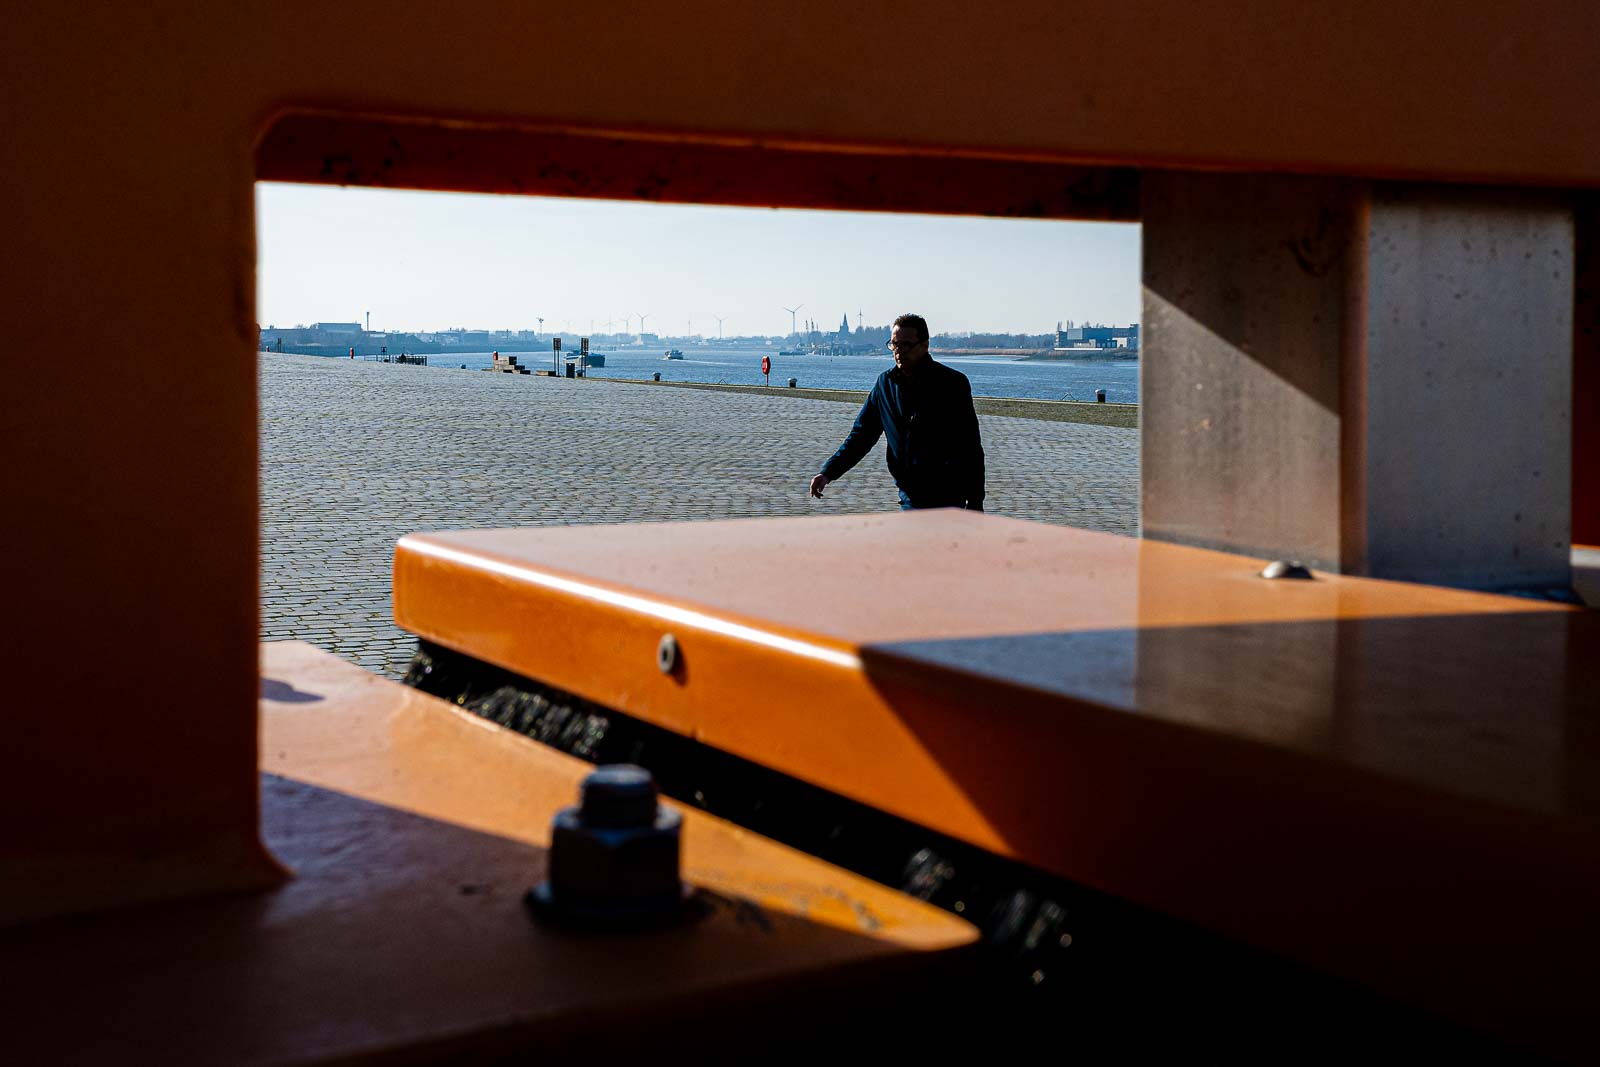
Walking the streets with my camera, I’m constantly looking for ways to make my subjects stand out from the urban chaos. Growth as an artist is a constant struggle, and trying to improve your compositions is a good and necessary reflex.
It’s easy to get stuck taking the same types of photos, but one of my absolute favorite tools to elevate a simple scene into something special is the frame within a frame technique.
If you’ve been searching for ways to add depth and context to your work, this compositional trick is a game-changer. Let’s dive into what it is, why it works, and how you can start seeing these opportunities everywhere.
What is frame within a frame photography?
Because so many people ask for a clear definition, let’s get right to it.
In photography, a frame within a frame is a compositional technique in which the photographer uses visual elements in the scene to create a secondary border around the main subject.
Instead of relying solely on the four physical edges of your printed photo or digital screen, you are creating an internal frame within the image.
This extra boundary can be made of anything you can think of or find: an archway, a window, tree branches, a gap in a fence, or even shadows. By shooting through something else, you naturally draw the viewer’s eye exactly where you want it to go.


Frame within a frame vs. fill the frame: what’s the difference?
Many photographers confuse the “frame within a frame” technique with another popular rule called “fill the frame.” They sound similar, but they are completely different approaches to composition.
- Fill the Frame: This means moving closer to your subject (or zooming in) so that your subject occupies almost the entire image. You leave little to no background visible to eliminate distractions.
- Frame Within a Frame: This technique actually embraces the environment. Instead of moving closer to eliminate the surroundings, you step back and use the foreground or background elements to “box in” your subject. It’s all about context.
If you are looking to simplify a scene by getting up close, you want to fill the frame. If you want to tell a broader story while still guiding the viewer’s eye, use a frame within a frame.
Why you should use this technique
Why would you add more to your frame? Isn’t good composition also about leaving out elements that aren’t important? Well, yes, but sub-framing actually helps you do exactly that.
- Adding visual depth: Photographs are flat, 2D objects. By adding an element to the foreground that borders your subject in the middle ground or background, you instantly give your image a 3-dimensional feel.
- Cleaning up a messy scene: Crowds are messy. By adding a clean-looking foreground to your scene, for example, shooting between two people standing in front of you, you can hide ugly bits and pieces and put the focus back on your subject.
- Leading the eye: Human eyes are naturally drawn to look through holes and gaps. An internal frame acts as a visual funnel, forcing the viewer to look directly at the subject.
- Adding context and story: A man sitting on a bench is a fine photo. A man sitting on a bench framed by the broken glass of an abandoned building tells a much more compelling story.


Creative frame within a frame photography examples
Knowing how and why to use this technique is a good start, but of course, you also need to find those opportunities out in the real world. Here are some of the most effective examples you can look for on your next photo walk:
1. Tunnel composition
Using tunnels is a classic, high-impact way to frame a subject. Whether it’s a pedestrian tunnel, a subway exit, or a dark alleyway leading out into a brightly lit street, the high contrast between the tunnel’s dark walls and the bright light at the end creates a powerful frame. Place a silhouette of a person or a cyclist right at the tunnel’s exit, and you have an instant winner.


2. Architectural elements (windows and doors)
Cities are practically built for this technique. Look for interesting front doors, open windows, archways, or even the pillars of a large building. You can shoot from inside a dark room looking out a window onto the street, or from the street looking into a cafe window.


3. Nature (trees, branches, and hedges)
You don’t need to be in a concrete jungle to find good frames. If you are shooting portraits in a park or out in nature, use overhanging tree branches or gaps in the foliage to frame your subject. A canopy of leaves wrapping around the top and sides of your photo adds a beautiful organic texture.


4. Urban objects and fences
Look for holes in wire fences, the space between the spokes of a bicycle wheel, or gaps in construction scaffolding. You can even shoot through the mirrors of cars or motorcycles parked along the street.


5. Light and shadow
A frame doesn’t even have to be a physical object! You can use pockets of light surrounded by heavy shadows to create a frame. If you have a harsh, dark shadow covering most of the street, but a single ray of sunlight hitting the pavement, wait for someone to walk into that pocket of light. The shadows act as the frame.


How to shoot it: hunting vs. fishing
When I’m shooting street photography, I use two main strategies to capture a frame within a frame.
1. Start with the subject (Hunting). Look for something or someone that interests you. You take some shots, like always, to be safe. Then, start looking around. Is there somewhere you can use to shoot through? Can you step behind a lamppost or a bike to add a foreground element? Find your subject, and then maneuver yourself to create the frame.
2. Find the frame and wait (Fishing). You can also work the other way around. Find an awesome frame, like a perfectly lit archway, a hole in an advertising board, or a beautiful tunnel, and then you just sit and wait. Have your camera settings dialed in. Eventually, an interesting subject (a pedestrian, a dog, a cyclist) will walk right into your frame. Click. It gives you such an incredible feeling of satisfaction.
Trying out new techniques can force you to look at the world around you differently. Next time you grab your camera, challenge yourself to find at least three internal frames. It might completely change how you see the streets!


5 thoughts on “A Complete Guide to Frame Within a Frame Composition in Photography”