
The rule of thirds is probably the most basic in photography. So what is it, and how can you use it to improve your photos? Let’s dive in!
What is the definition of the rule of thirds?

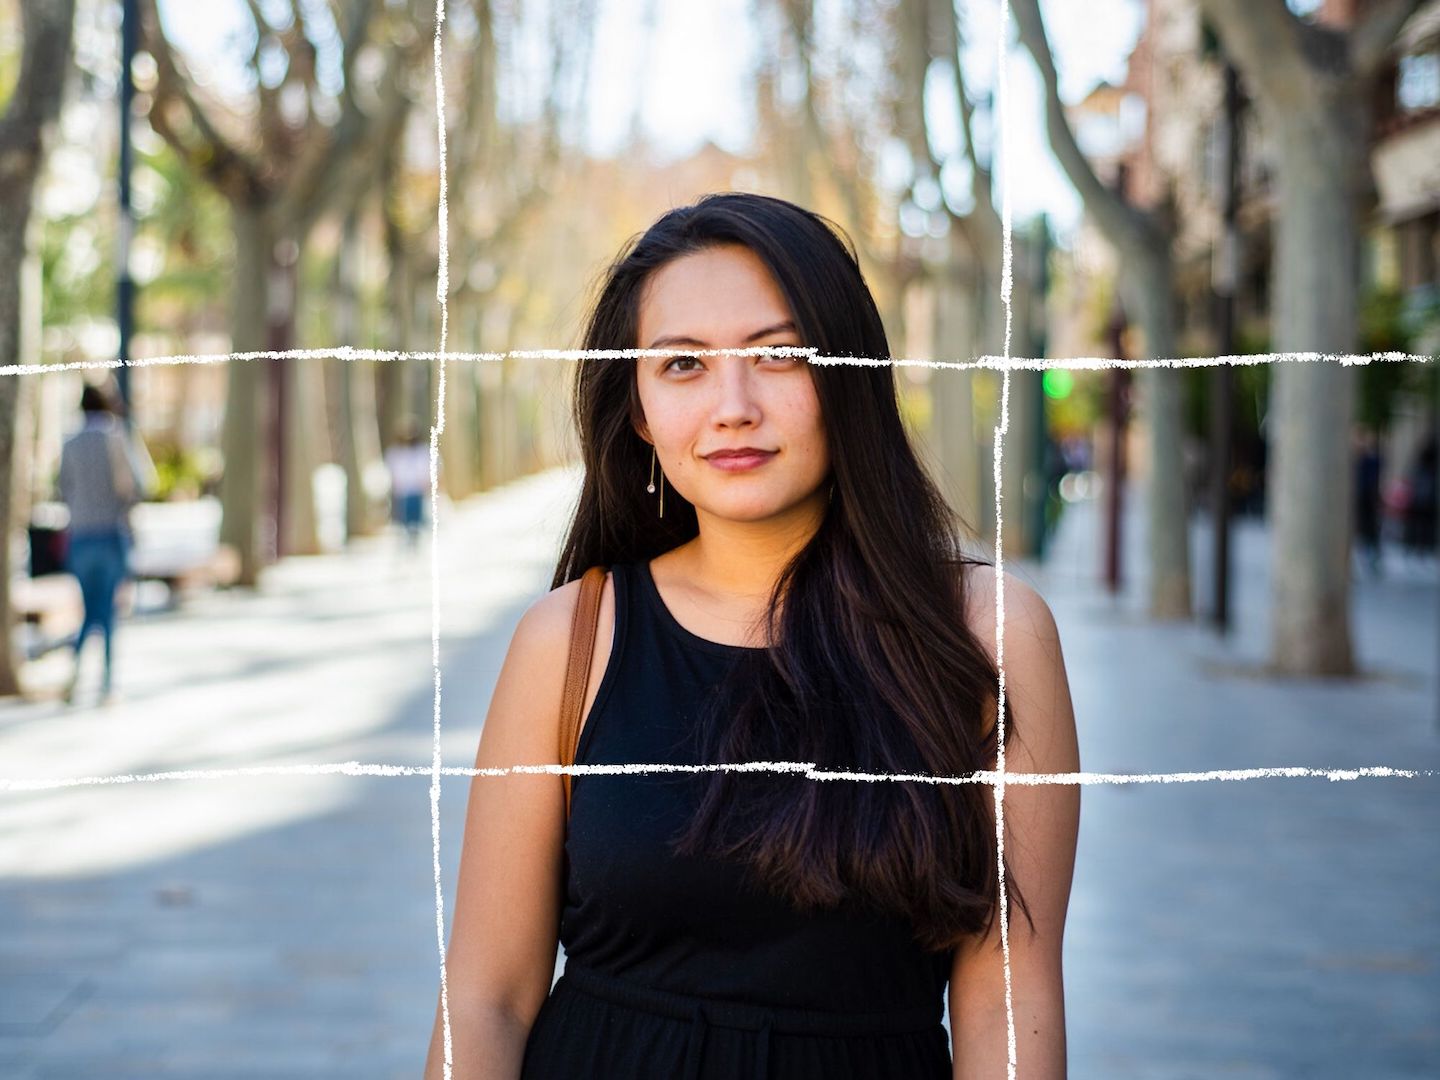
Portrait of my girlfriend 
Rule of thirds grid on portrait. Eyes positioned on upper third
The rule of thirds is a guideline that should help you with your photographic compositions by dividing your image into 9 equal parts. The 9 parts create two horizontal lines and two vertical lines across your image.
The thirds rule states that if you position your subject on one of the 4 lines now created, the attention should go straight to your subject.
The Wikipedia definition for the rule of thirds:
The rule of thirds is a “rule of thumb” or guideline which applies to the process of composing visual images such as designs, films, paintings, and photographs. The guideline proposes that an image should be imagined as divided into nine equal parts by two equally spaced horizontal lines and two equally-spaced vertical lines, and those important compositional elements should be placed along these lines or their intersections. Proponents of the technique claim that aligning a subject with these points creates more tension, energy, and interest in the composition than simply centering the subject.
What is the rule of thirds in photography?
So, what actually is the rule of thirds?
Well, the name is misleading since it’s actually a guideline. Take a photo; any will do. Now split up the photo horizontally with 2 lines. This separates the photo into 3 pieces, right? Now do the same but vertically.
You now have 9 parts in your photo that are all equally as big. You also have 4 lines going straight to your image and 4 places where those lines intersect.
Those lines and intersections are the most important part of the rule of thirds.
How to apply the rule of thirds?

Travel photo in Southern Tyrol 
Grid added for composition reference
Take your camera or smartphone and compose a shot, any shot. Now, imagine those lines on your screen or in your viewfinder.
Whatever your subject is, try to position it on one of those intersections or lines.
If it’s a small subject, it’s a lot easier to put it on one of the intersections. For example, something taller, like a tower, might be more interesting to put the top window on an intersection with the tower on the rest of the line.
Our eyes are naturally attracted to those intersections and lines. So positioning your subject there is a brilliant way to draw attention to it.
Of course, it’s best to do what feels natural. Placing your subject on one of the thirds exactly might feel weird. Just make sure to be aware of the lines.
Some examples of the rule of thirds in photography.

Corporate photo for guided walk 
Head and hands on right thirds, crowd on left third

Damselfly macro shot 
Body on upper third curving down to lower left intersection

Macro shot of mushrooms 
Mushroom positioned against right third
Travel photo in Southern Tyrol Grid added for composition reference


travel photo rule of thirds
The rule of thirds in portrait photography
In portrait photography, the rule of thirds is fairly simple to apply. In general, no matter the crop or orientation, the eyes are placed on the upper third.
This works for close-ups and wider more environmental portraits.
In close-ups you usually frame the shot fairly central. So the face fills the entire frame. In wider portraits, you can place the person on the left or right third and make them look slightly into the rest of the frame.
Portrait of my girlfriend Rule of thirds grid on portrait. Eyes positioned on upper third 


2 thoughts on “The complete guide to the rule of thirds in photography”