
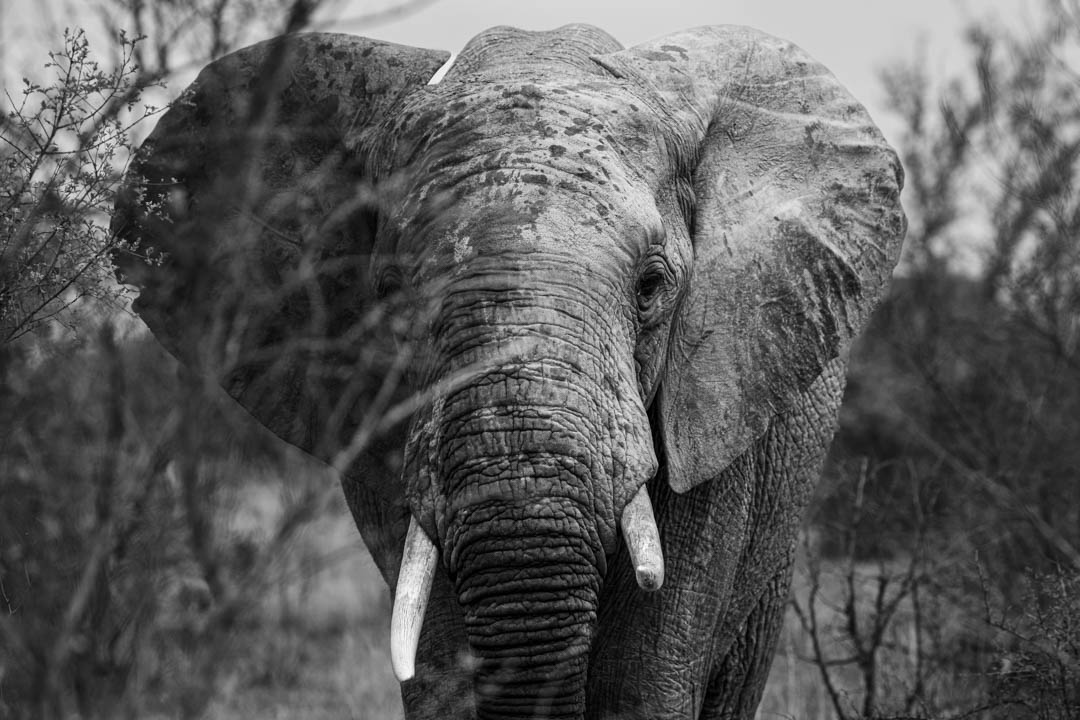
IIn October 2022, I visited the beautiful Kruger National Park in South Africa. It was a breathtaking experience with wildlife. We even spotted the Big Five within 24 hours of arriving at the park. In this article, I want to share my favorite Kruger National Park photos and give you some practical tips to make the most of your own trip.
Whether you are looking for inspiration for your own wildlife photos or just want to see Kruger National Park animal photos, I hope this guide helps you prepare for your adventure.
My itinerary for a Kruger National Park photo safari
My trip to South Africa was originally for a wedding near Cape Town. Of course, I am not flying from Belgium all the way there for just a weekend. So we added a tour around South Africa following the wedding weekend. A major part of that trip was a dedicated photo safari in Kruger National Park.
In early October 2022, we spent three days and two nights in the game reserve. It was already dark upon arrival, so we could not enter the park just yet. We stayed the night at the border in Pestana Kruger Lodge near the Malelane Gate. If you are a local driving up from elsewhere in South Africa, or an international visitor renting a car, this southern entrance is a highly accessible starting point.
An early morning breakfast overlooking the river already gave us our first sightings of an elephant and hippos. Once we drove through the Malelane gate’s security checkpoint, the real Kruger National Park photo safari began. We saw impalas, elephants, and lions within the first hour.
With some detours, we arrived at Lower Sabie rest camp for lunch. After our break, we made our way to Skukuza. Again, we took the necessary detours to maximize our chances for wildlife photos. We spotted more lions, elephants, hyenas, buffalo, and a variety of birds.
At 8 PM, long after dark, we had a night drive booked. With the big spotlights on the vehicle, it was easy to spot the animals. Even at night, they just roamed close to the roads. With my f/1.8 50mm lens, it was possible to photograph them. However, a fast 85mm or a 70-200mm f/2.8 would have been much better for this type of low-light work.
After a night at the Skukuza Safari Lodge, we had a full safari day with a private guide. He drove all three of us around the southern part of the park. That day we saw so much. Before lunch, we completed our Big Five with several leopards and a crash of rhinos.
After lunch in Berg-en-Dal, we returned to Skukuza. The heat was catching up with us, and it was simply too hot to see anything moving. We only spotted some Southern Ground Hornbills and a couple of elephants trying to cool down.
After another night, we woke up early for a sunrise drive. We were expected at the pickup point at 4:30 AM. It was incredibly early but absolutely worth it. We had some lions all to ourselves for a while in the beautiful morning light. The morning trip ended at 8:30 AM, just in time for us to grab breakfast at the hotel, pack our gear, and take a final self-drive to the Malelane gate and Eswatini.
My Kruger National Park photography


Best time of year for photography in Kruger
The season you choose will have a massive impact on your Kruger National Park photos. I visited in early October, which is a transitional period, but generally, you can divide the year into two main photography seasons.
Dry winter (May to September): The bush is sparse, and the grass is low, making it much easier to spot animals. Wildlife also congregates around permanent water sources, so you can just park your car at a waterhole and wait. The dust in the air during this time creates incredibly atmospheric and golden sunsets.
Wet summer (October to April): The park transforms into a lush and green paradise. It is harder to spot animals through the thick vegetation, but the backgrounds of your photos will be vibrant. This is the best time for bird photography and spotting newborn animals.
Specific wildlife camera settings
Getting the right settings is crucial when the action happens fast. While your exact settings will change depending on the light, here is a good baseline to start with.
Shutter speed: Wildlife moves unpredictably. Use a fast shutter speed of at least 1/1000s or faster for moving animals or birds in flight. You can drop it down for stationary subjects to keep your ISO low.
Autofocus: Switch your camera to continuous autofocus. This is AF-C on Nikon and Sony, or AI Servo on Canon. It allows your camera to track the animal as it moves through the frame.
Aperture: Shoot wide open at f/2.8 or f/4 to isolate your subject against a blurry background. If you want an entire herd of elephants in focus, stop down to f/8 or f/11.
9 tips for a successful Kruger National Park photo safari
To make your photo safari in Kruger National Park a success, you can learn from my experiences and my mistakes. Taking great Kruger park photos requires a mix of luck, patience, and preparation. Here are my top tips.
1. Do self-drives but also book guided tours
Self-driving is incredibly fun. You get to decide where you go and how long you stay somewhere to get the perfect picture. You can also do that with a private guided drive, which does cost some money.
However, guided drives are highly beneficial for photography. The guides know exactly where to look and communicate with each other over the radio. Especially for elusive animals like leopards and rhinos, having a local guide will drastically improve your chances of getting great shots.
2. Go on drives as much as you can
We filled our days completely. We went out in the morning, at noon, and in the evening. We filled every possible hour with drives. The simple rule of wildlife photography is that the more time you spend out in the field, the more you will see.
3. Talk to the other cars
If you are driving yourself, roll down your window and talk to other drivers. Ask them what they have seen and where they spotted it. Wildlife moves fast, but fresh tips from a car coming from the opposite direction are the best way to track down a specific animal you want to photograph. If you have a guide, they will usually do this networking for you.
4. Do not focus too hard on the daily sighting boards
You will see sighting boards in all the rest camps where visitors pin what they saw. They are fun to look at, but they are not always accurate in terms of time or exact location. They can give you a general idea of what is in the area, but if a hyena was spotted somewhere three hours ago, it has probably moved on. Talking to other drivers on the road is a far more efficient way to find subjects.
5. Bring a variety of lenses
This was my biggest mistake in Kruger National Park photography. I only brought my 50mm and my 150-600mm, and I had them all on one camera body. Because it is incredibly dusty in the park, switching lenses on the fly did not happen often. If an animal approached too close, my 150-600mm lens was useless, and I missed the shot. And believe me, they do come close.
Go from wide to telephoto with your lens choices. Ideally, you want a 24-70mm or 70-200mm on one body and a long telephoto, such as a 100-400mm or 150-600mm, on another. Having multiple camera bodies so you do not have to change lenses on dusty dirt roads is the best way to protect your gear and never miss a moment.
6. Prepare for the harsh African sun
The light in South Africa is intense. Midday sun creates harsh shadows that are very unflattering for wildlife portraits. Use the middle of the day to rest or travel between camps.
Focus your intensive photography efforts on the golden hours just after sunrise and right before sunset. The soft, warm light will make your images of Kruger National Park look far more professional.
7. Be patient at watering holes
Instead of constantly driving around looking for action, sometimes the best strategy is to park near a watering hole or riverbank and just wait. Turn off your engine, get your camera ready, and observe. Animals will eventually come to drink, and you will have the perfect stable setup to capture them in a natural environment.
8. Consider renting gear locally
If you are traveling from the United States or Europe and do not want to risk flying with heavy, expensive telephoto lenses, look into renting gear. There are camera rental shops in major South African cities like Johannesburg and Cape Town.
You can rent a professional 400mm or 600mm prime lens for a fraction of the cost of buying one, and it will elevate your photos immediately.
9. Think about the environment, not just the animal
It is easy to get tunnel vision and zoom in as far as possible to capture a tight headshot of a lion or an elephant. While those shots are great, do not forget to zoom out. Showing the animal within its habitat tells a much stronger story. Include the dry savanna, the dramatic clouds, or the acacia trees to give your viewer a true sense of place.
10. Master night game drive photography
We booked a night drive and saw plenty of animals, but photographing them is a completely different challenge. The only light source is the vehicle’s spotlight. Do not use your flash, as it can temporarily blind and stress the nocturnal animals.
Instead, rely on a fast lens. My f/1.8 50mm worked well to let in enough light, though an 85mm f/1.8 would have been better for the distance. Push your ISO high to get a usable shutter speed. You will get noise in your images, but modern noise-reduction software handles high-ISO files incredibly well.
4 thoughts on “Kruger National Park photography: best safari photos, pictures and tips”