

There is something magical about looking in someone’s eye. It’s often called the window to the soul. I think there is something to it. Anyway, as a macro photographer, I think eye photography is a lot of fun!
Why eye macro photography is such a good idea
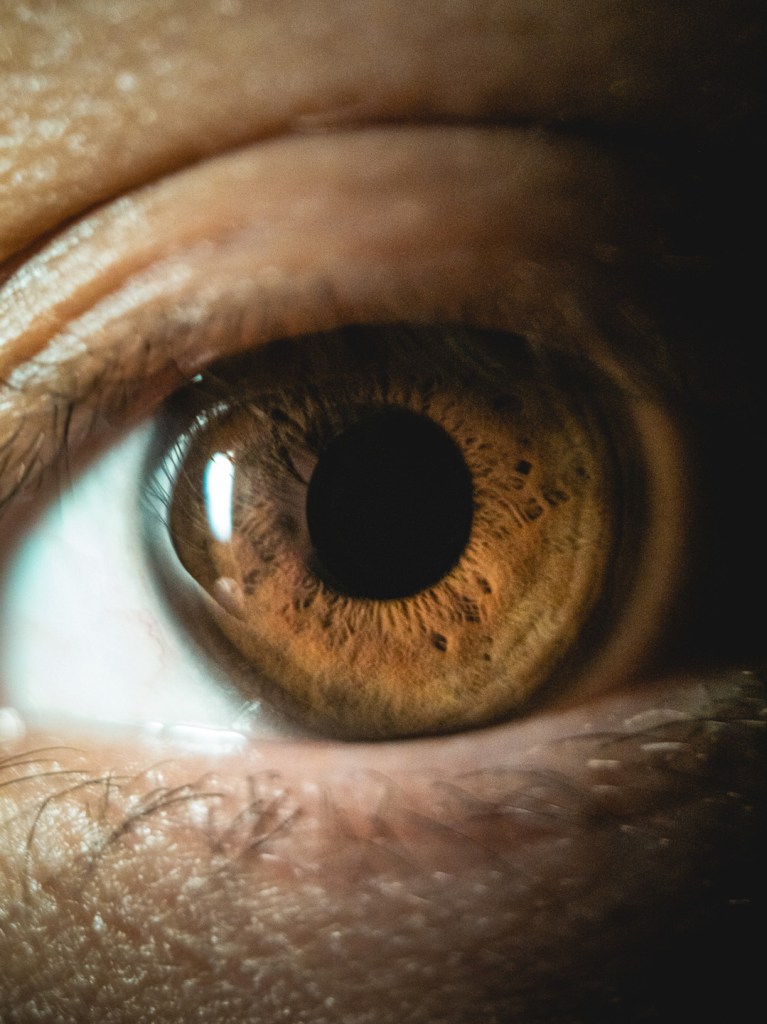
Eye macro photography is, first of all, a lot of fun to do. Finding out how to do it is a big part of the fun. It’s also a very accessible way to practice your macro photography. Just ask a friend or family member to pose for you. You don’t have to spend time figuring out where to go looking for insects to photograph. You can do it at home.
It’s also an amazing subject. Looking at eyes, the texture, and the colors. Not one eye is the same, so you get new results with every new friend or family member you photograph.
Tips on how to do eye macro photography
Higher f-numbers!
Let’s start with the why of the story. Macro lenses are pretty weird compared to other lenses. Usually, if we go to a low f-stop number (or wide aperture opening), we enjoy that sweet, sweet bokeh.
With macro, that’s not always a good idea. Because you get closer to your subject, the depth of field narrows drastically. The same f2.8 that allowed you to photograph a person’s portrait razor-sharp now gives you only a millimeter of DoF.
So, you have to boost that number up. F8, f11, maybe even go as far as f22. This means you have to boost that ISO too. Or get more lights in.
When photographing insects, that can be really hard to do. Especially when you are just starting, to practice this technique, try photographing a human eye in macro.
You can ask your favorite human to be still while you get close to their iris to photograph it. For that reason, I think macro photography of eyes is such a good way to practice with a new lens.

Use plenty of light
Try to use natural light. Go into a room with a lot of light coming inside. Maybe you have tall windows in your living room? This way, you have a nice and natural light on your subject.
If there is no possibility to do so, use your own lights. Try to use plenty of light, without blinding your model, of course.
Use a big f-number (small aperture opening)

Go for a narrower aperture. Try f8 first, and then step your way down to f11, f16, and maybe even f22 if necessary. Make sure to review your photos as you go to see which works the best for you.
It’s all dependant on what lens you use and how close you get to your subject. With my Nikon 60mm macro lens, I have to get a lot closer than a 100mm lens. Thus making me use f16 rather than an f11.
Ask your subject to be still
It’s not all fun and games. Although, you should keep it fun! Be sure not to make your model laugh or react too hard when you try making a photo. The model has to be as still as possible. Give him or her a point to look at, so they can focus.
Even a small turn of their head can throw your focus off, so really ask them to stay still. You can even ask them to lie down on a steady surface.
Remove the lens hood to get as close as possible

I’m an advocate of using your lens hood as much as possible. Apart from sun rays that might ruin your photo, they also protect you from any damage that might occur when hitting your lens on something. (As an event photographer, this happens a lot!)
In this case, however, it’s not that useful. It blocks you from getting close to photography the eyes properly. And in many cases, it will also cast a shadow on the eyes.
The camera-settings for photography of eyes

There is no magic setting that will allow you to photograph eyes in any circumstance. However, there are a couple of ideas you can follow.
As I already told (twice actually) in this article, try and use a bigger f-stop. Go for f8 and up. This will allow you to have plenty of depth of field to capture the beauty in your model’s eyes.
Next, set a shutter speed that allows you to take sharp photos. A good rule of thumb is to stay above the length of your lens multiplied by 2.
Example: My macro lens is 60mm. So 60 x 2 = 120. I should stay above a shutter speed of 1/120 to have sharp photos.
Then adjust your ISO to make sure those photos are exposed properly. Usually, somewhere between 64 and 800 should do the trick. Some cameras can go even higher without too much noise being added.
I can’t wait to see your results. If you share them on Instagram make sure to use #Fredography and tag me if you post them on Twitter or Facebook!


2 thoughts on “Macro photography of the eyes: tips and examples”