
Light painting is a simple kind of photography. Especially in the wintertime, when it’s dark early, it’s a genre of photography you can practice. In this blog post, I explain how to do light painting photography.
Shoutout to my buddy Fons to help me out!
What do you need for light painting

First of all, you’ll need a light. Anything that gives of a decent amount of light and is mobile is good. I used my smartphone flashlight. You can also use a pocket light, a lighter, or even a match. However, make sure you get a consistent and easy to maintain light source.
A camera with a long shutter speed option. If you have a DSLR, you certainly have an option for long shutter speeds. If you use a simpler camera it often has a night-function or light painting feature. These days, smartphone have these features too.
A tripod or sturdy underground helps you to maintain a steady shot. You want the light to move around, not your camera. So having a tripod for your camera or little tripod for your smartphone helps a lot.
Either a friend or a remote shutter. In this case, I asked a friend to do the light painting for me while I directed him. However, if you want to do it by yourself, you can use a remote shutter function which most cameras have or a timer that allows you to click the shutter button and then get into place.
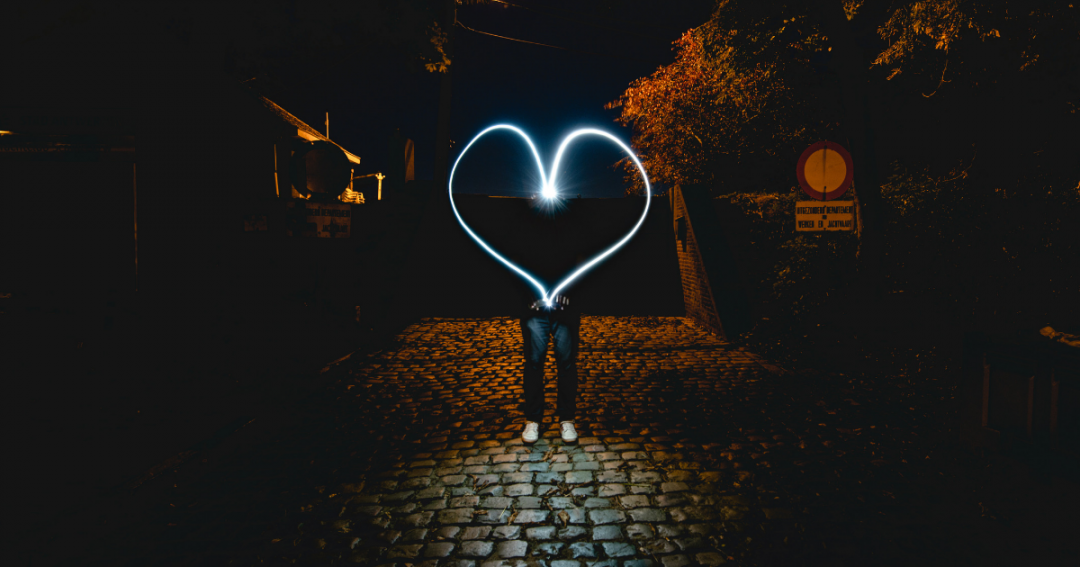
Start with simple shapes

So, with your camera all set up, it’s time to start photographing your light paintings. The best thing to do is start with a simple shape. Lines are great to check the intensity of the lights, but if you really want to get into shapes I recommend a heart.
With a light in each hand, it’s the easiest shape to create. Of course, you can also try triangles, squares, or circles.
Use two light sources
Having a light source in each hand can help you draw shapes easier. This way you can coordinate the starts and ends of your shapes better. This technique is how we got the perfect heart shape the easiest. Of course, this is not always the best solution, but it is one that can help you out a lot.
Work your way up to harder shapes

Work you’ way up to harder shapes. Try light painting stars or 3D objects like cubes and pyramids. Evaluate your photos constantly so you can improve your shapes. For this star, we had to take several photos before we had the balance between all it’s legs right. Experimentation is key.
Use lights to fill in subjects

You can also do more than just shapes. Put a friend in the frame and paint behind him/her. This way you can add some extra fun to a portrait. Of course your subject has to stand perfectly still… which is pretty hard to do.
Try to give your friend a frame around their person. Or maybe give them wings? There are no limits to this. It’s all just your imagination!
Have a laugh with your friends

You can also be a bit of a dick… or well, make them one. You can paint whatever you want. So make sure to have a bit of a laugh too. You will have to redo a lot of your photos and it might be a bit frustrating at some points. So doing a couple of ridiculous light paintings will help you to keep the spirits lifted.
Have you done any light painting photography? Show me the results on Twitter and Instagram by tagging me!

4 thoughts on “How to do light painting photography”